Machines don’t warn you twice. A single slip during maintenance—a circuit accidentally energized, a pressurized line left live—can result in amputations, electrocutions, or fatalities. The lockout tagout (LOTO) procedure exists to eliminate that risk. It’s not just policy; it’s a sequence of disciplined actions designed to isolate all hazardous energy sources before work begins. Yet, despite OSHA’s clear standards, 12% of industrial accidents stem from failed energy control—most due to skipping or misapplying basic LOTO steps.
Here’s how to get it right: a detailed, field-tested breakdown of the seven essential lockout tagout procedure steps, with real-world applications, common traps, and operational precision.
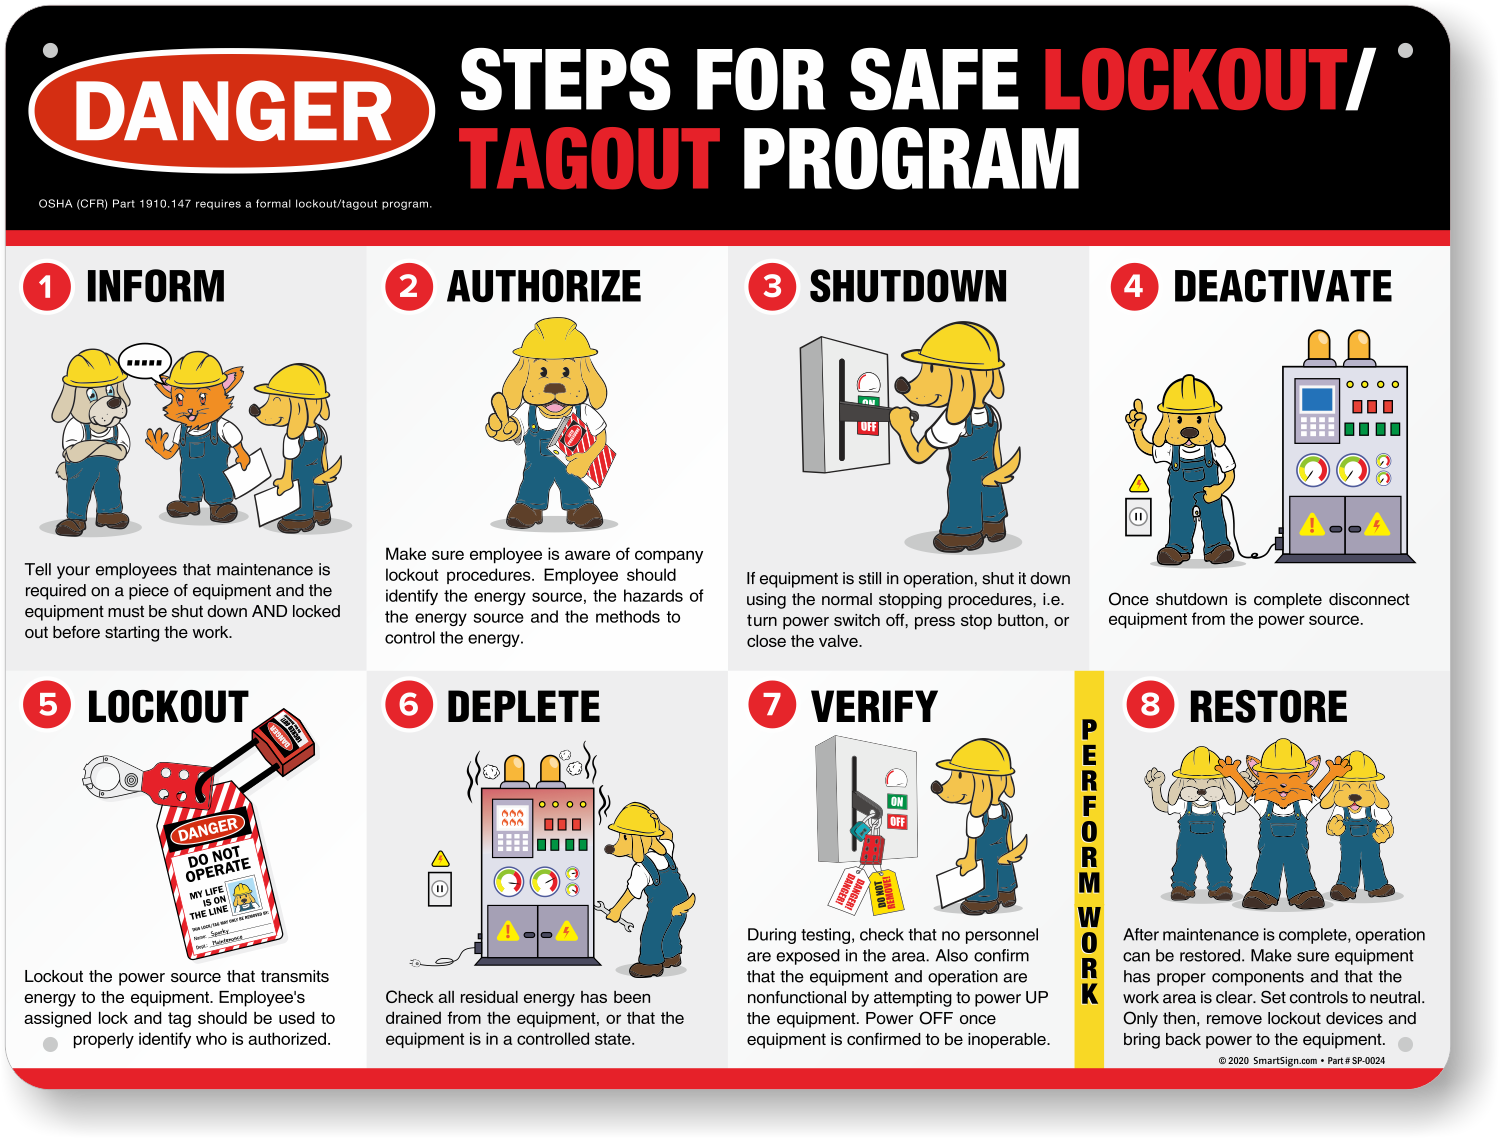
Step 1: Prepare for Shutdown Before touching a lock or tag, you must understand what you’re shutting down—and how. This step separates reactive workers from safety-conscious technicians.
Preparation means: - Identifying the type and magnitude of energy sources (electrical, hydraulic, pneumatic, chemical, thermal, gravitational) - Reviewing equipment-specific LOTO procedures - Notifying all affected personnel about the upcoming shutdown
Real-World Example: A mechanic at a paper mill needs to replace a roller on a conveyor. The system runs on 480V AC, uses pneumatic clamps, and holds tension via overhead counterweights. The mechanic gathers locks, tags, and a voltage tester—and confirms with the shift supervisor that downstream processes will pause.
Common Mistake: Assuming one-size-fits-all lockout methods. A CNC machine isn’t shut down like a boiler. Energy sources vary. So must your preparation.
Workflow Tip: Use a pre-shutdown checklist. Include equipment ID, energy types, isolation points, and required PPE. Digital tablets with LOTO apps can streamline this—especially in facilities with hundreds of machines.
Step 2: Notify Affected Employees
Communication gaps kill. OSHA requires that all employees who operate or work near the equipment be informed before shutdown.
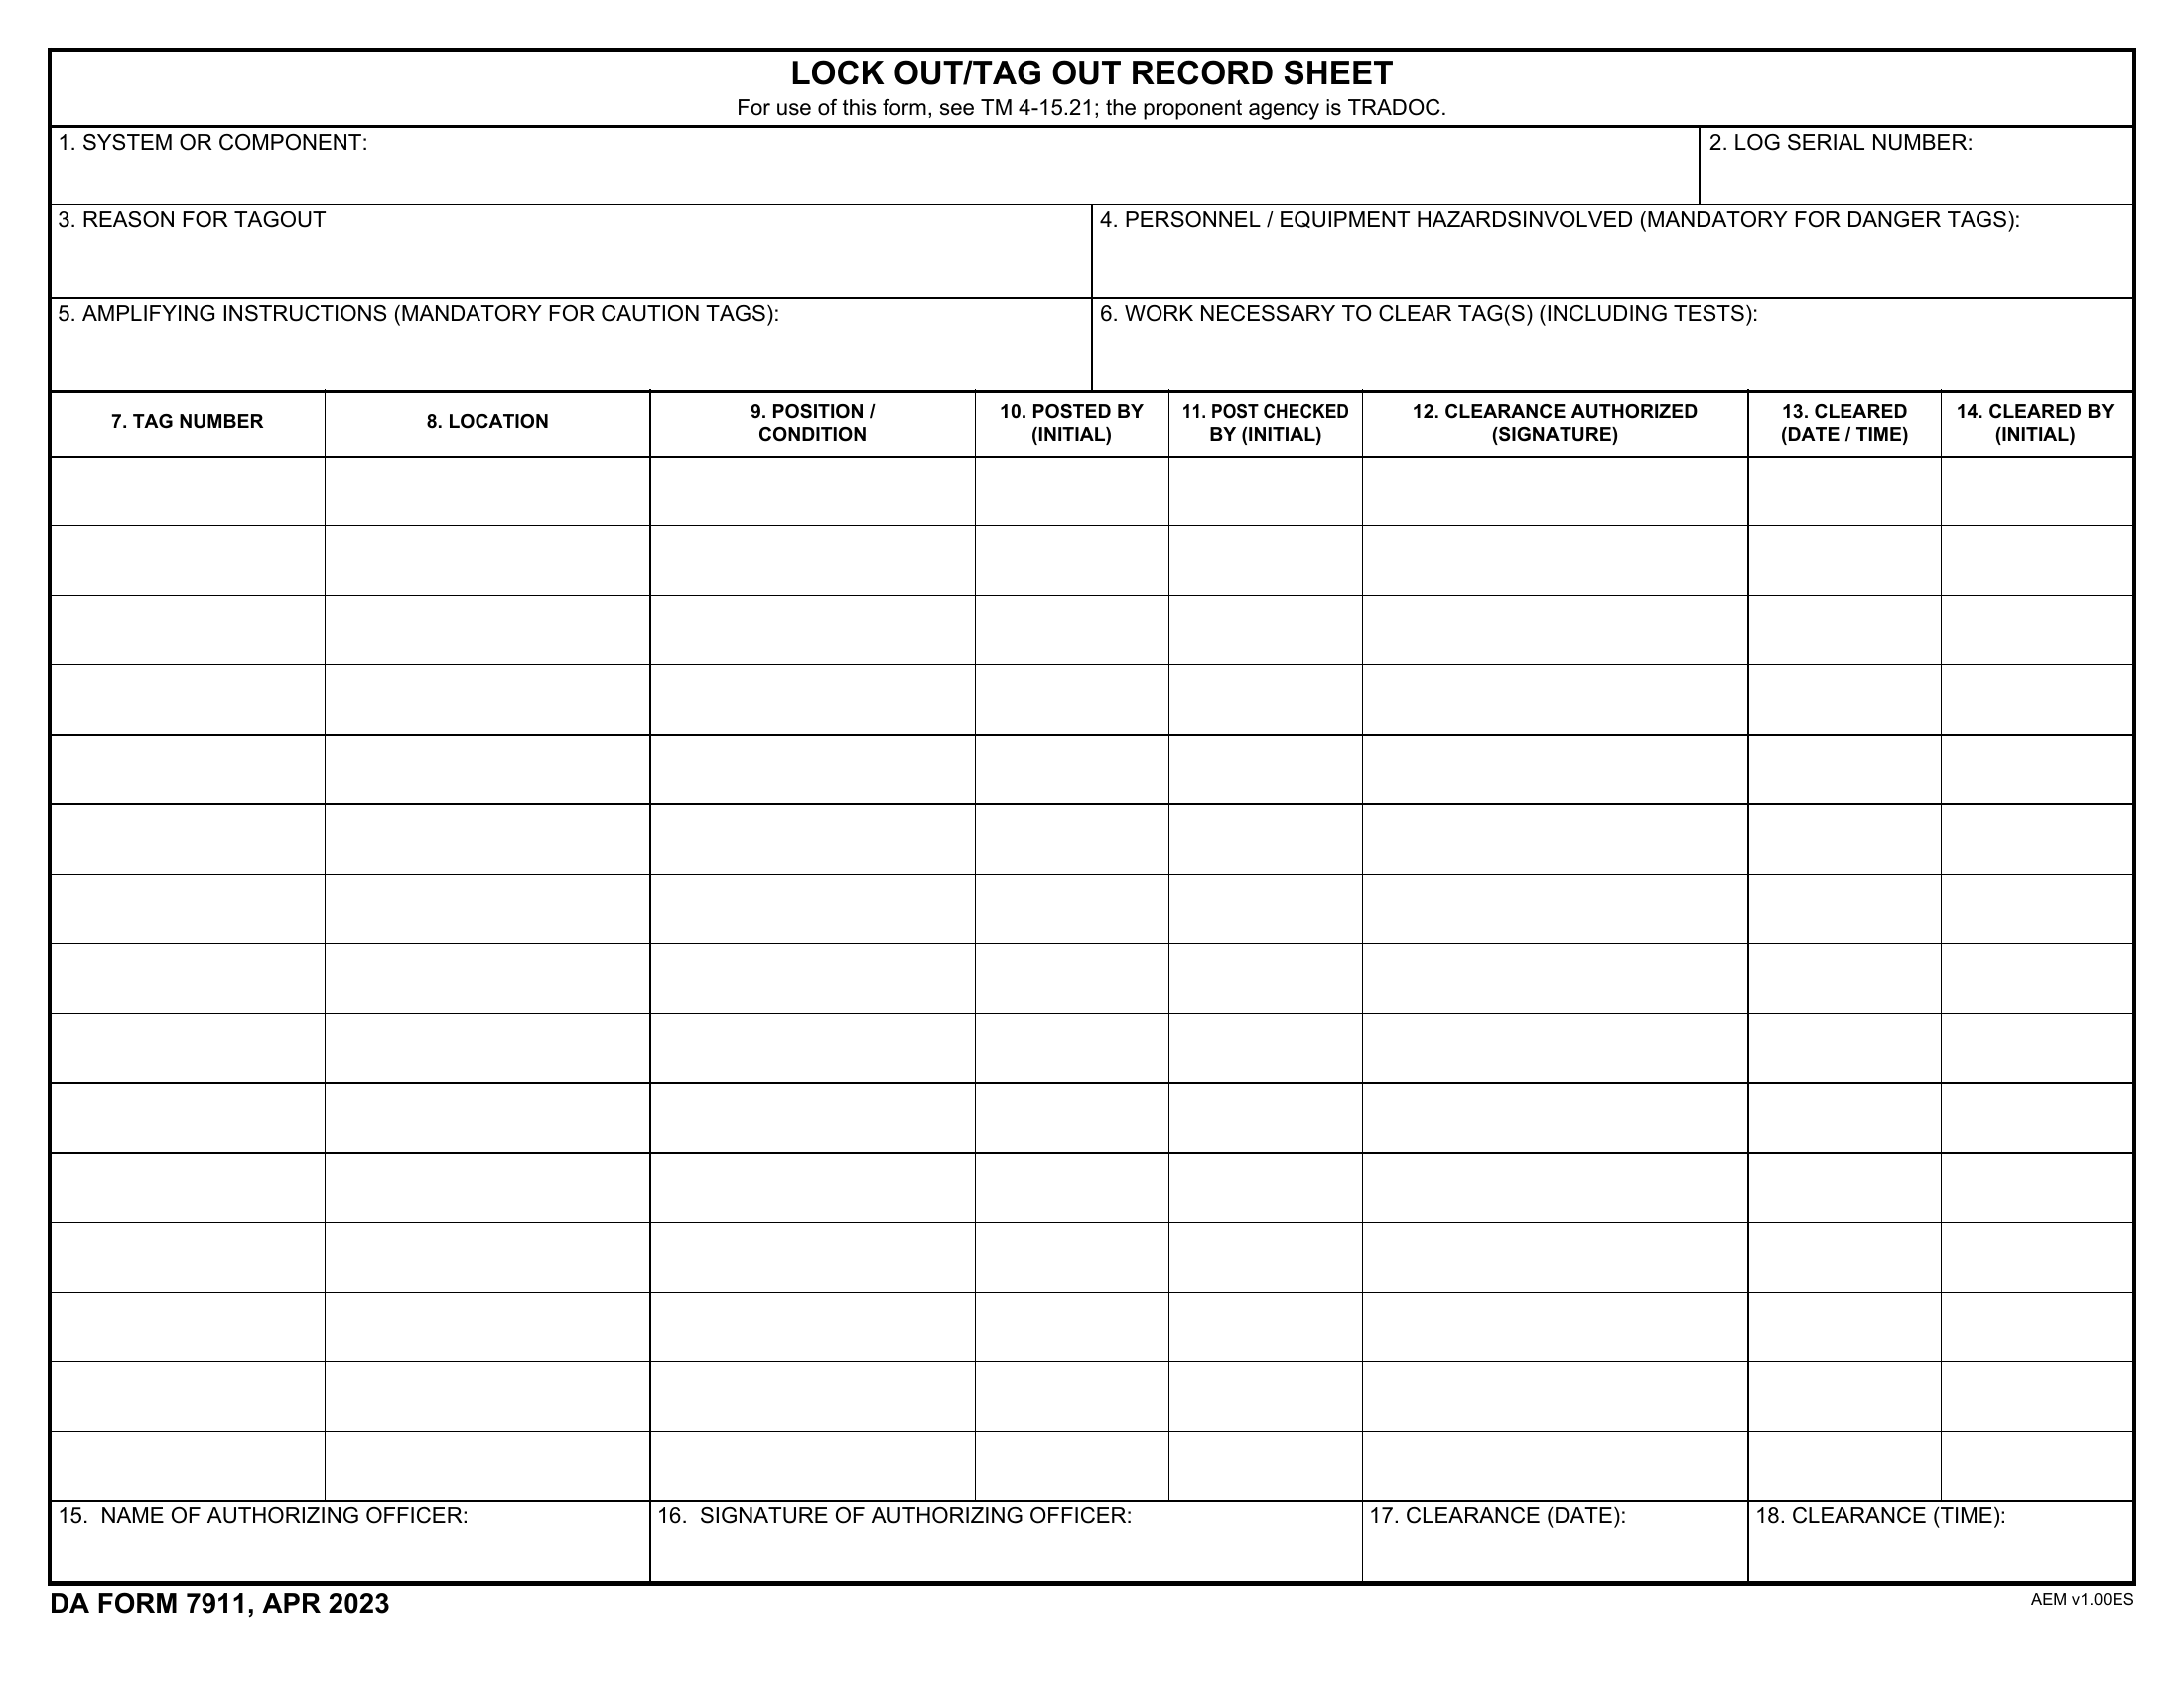
This isn’t just a PA announcement. It’s direct, documented contact: - Verbal or written notice to operators, attendants, and nearby teams - Confirmation that operations will cease - Clear timeframe for the lockout
Use Case: During a plant-wide maintenance window, a supervisor walks the floor, alerts each team leader, and signs a log confirming notification. This creates an audit trail and prevents someone from unknowingly restarting a machine.
Limitation: Shift changes complicate notifications. A worker on break may return and attempt to restart equipment. Solution: use shift交接 logs (handover sheets) and visible status boards.
Step 3: Shut Down the Equipment Properly
This sounds obvious—but improper shutdowns create stored energy hazards.
Follow the manufacturer’s shutdown sequence: - Power down controls - Press emergency stops (but don’t rely on them as isolation) - Allow moving parts to stop naturally - Depressurize where applicable
Critical Insight: Emergency stops are not lockout devices. They cut control voltage but may leave power at the motor starter.
Example: A packaging line uses spring-loaded tension arms. If the motor stops but the springs remain compressed, that’s stored mechanical energy. The shutdown must include releasing that tension—safely—before proceeding.
Pro Tip: Use a shutdown verification form. Operators sign off that the machine is idle, guards are in place, and no residual motion exists.
Step 4: Isolate All Energy Sources
Now comes the core of LOTO: physically disconnecting every energy source.
Common isolation points: - Electrical: circuit breakers, disconnect switches - Pneumatic: manual shutoff valves - Hydraulic: block valves, bleed fittings - Thermal: isolation valves for steam or coolant - Gravitational: support stands, blocks
Each point must be isolated with a lockout device—a hasp, valve lock, circuit breaker lock, or plug lock. One lock per energy source. One key held only by the authorized employee.
Practical Application: A technician servicing a hydraulic press: - Opens the main electrical disconnect and applies a lockout clamp - Closes the hydraulic fluid supply valve and installs a valve lock - Opens the pressure relief valve to bleed residual fluid - Secures the ram with support rods to prevent drop from gravity
Common Error: Missing secondary energy. A hydraulic system may store pressure even after the pump is off. Always bleed, vent, or block.
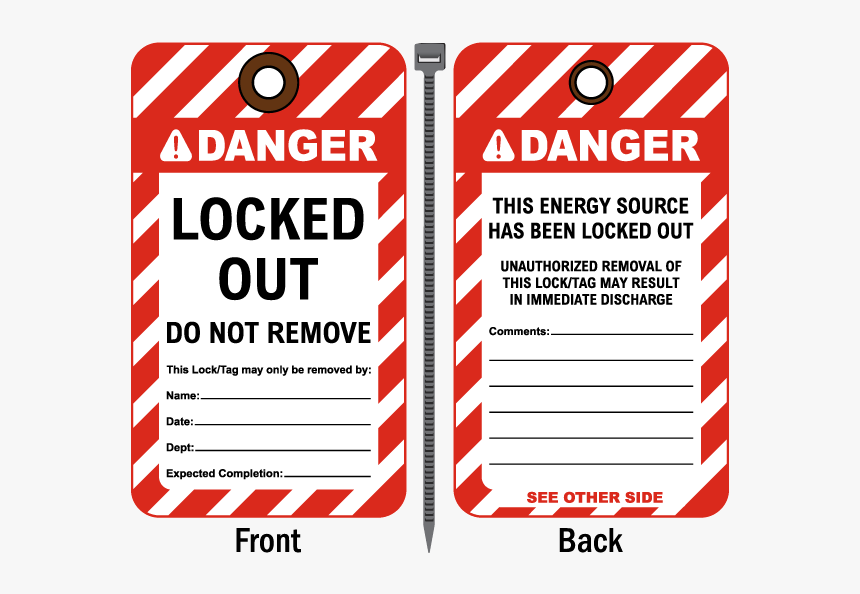
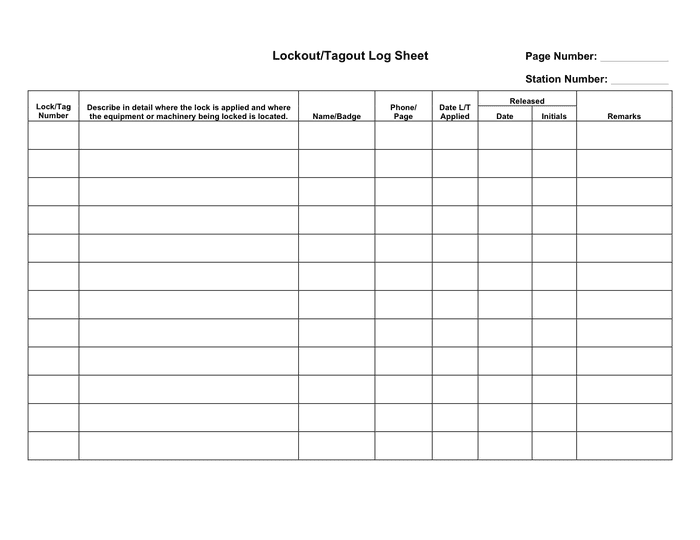
Step 5: Apply Locks and Tags Locks prevent re-energization. Tags communicate why.
Each authorized employee applies their own personal lock and tag. No shared locks. No master keys. No exceptions.
Tag contents must include: - Name of the authorized employee - Date and time of lockout - Reason for LOTO - Department or work group
OSHA Rule: Tags must be durable, legible, and securely attached. They are warnings—not physical restraints.
Real-World Gap: In rush repairs, workers use “team lockout” devices incorrectly. A group lockout box is valid—but each technician must still apply their personal lock to the hasp.
Checklist: - [ ] One lock per person - [ ] Tag filled out completely - [ ] Locks applied at every isolation point - [ ] Tags visible and not obscured
Never rely on tags alone for energy isolation. If a device can’t be locked (e.g., older equipment), use a tagout-only procedure—but only if it provides equivalent protection.
Step 6: Release or Control Stored Energy
This step is often rushed—but it’s where many incidents occur.
After isolation, residual energy remains: - Capacitors holding electrical charge - Springs under tension - Pressurized lines - Suspended loads - Hot surfaces
You must: - Bleed lines - Ground capacitors - Block moving parts - Allow cooldown
Example: An HVAC technician servicing a chiller unit: - Locks out the compressor’s power disconnect - Tags the main control panel - Opens manual valves to release refrigerant pressure - Installs blind flanges to isolate lines - Waits 20 minutes for residual pressure to stabilize
Danger Zone: Stored energy can persist for hours. Thermal systems may retain heat. Springs can fail catastrophically. Always verify.

- Verification Tool: Use a “live-dead-live” test for electrical systems:
- Test a known live circuit to confirm your tester works
- Test the target circuit—it should be dead
- Re-test the known live circuit to ensure your device didn’t fail
Step 7: Verify Isolation (Zero Energy State)
You’ve locked, tagged, and bled—but is the machine truly safe?
Verification means testing for zero energy: - Use a multimeter on electrical lines - Check pressure gauges on fluid systems - Attempt to operate controls (after confirming no one is in the danger zone)
OSHA Requirement: The authorized employee must verify isolation before starting work.
Use Case: A maintenance team replaces a motor on a crusher. After LOTO steps 1–6, they: - Test phase-to-phase voltage: 0V - Confirm pressure gauge reads 0 psi - Briefly jog the start button: no response - Visually inspect guards and clearance
Only then do they begin disassembly.
Red Flag: Skipping verification because “the lock is on.” Locks fail. Circuits get misrouted. Always test.
Common LOTO Procedure Failures and How to Fix Them
Even experienced teams make these mistakes:
| Failure | Risk | Solution |
|---|---|---|
| Using someone else’s lock | Unauthorized re-energization | Enforce personal lock policy |
| Skipping stored energy release | Uncontrolled motion | Add bleed/vent step to checklist |
| Incomplete tagging | Miscommunication | Mandate full tag fields |
| Group lockout without accountability | Lost ownership | Use lockout hasps with individual locks |
| Not verifying zero energy | False confidence | Require test-before-touch protocol |
Culture matters. If workers feel pressure to skip steps, compliance erodes. Supervisors must model LOTO discipline—not reward speed over safety.
LOTO Device Types and Their Correct Use
The right hardware ensures reliability. Here are five essential lockout devices:
| Device | Purpose | Best For |
|---|---|---|
| Padlock (safety-only) | Personal lockout | Electrical disconnects, control panels |
| Valve Lockout | Prevents valve operation | Pneumatic, hydraulic, gas lines |
| Circuit Breaker Lock | Secures breaker in OFF | Electrical panels, motor controls |
| Plug Lockout | Blocks power cord insertion | Portable tools, plug-connected machines |
| Group Lockout Hasp | Enables team isolation | Multi-craft maintenance |
All locks should be standardized—same color (usually red), labeled “Danger—Do Not Operate,” and key-retained (key can’t be removed when lock is engaged).
Final Step: Safe Re-energization
LOTO doesn’t end when the work is done. Restarting requires care.
- Safe re-energization:
- Confirm tools are removed and guards reinstalled
- Verify all employees are clear of the equipment
- Remove locks and tags—only by the person who applied them
- Notify affected staff before restart
- Restore energy and test operation
Critical Rule: Never remove someone else’s lock. If a worker is unavailable, a formal authorized removal procedure must be followed—typically involving management, verification of absence, and documented steps.
Example: A technician who left early forgot to remove their lock. The supervisor follows the plant’s removal policy: confirms the worker is off-site, checks that the machine is safe, logs the action, and removes the lock under supervision.
The lockout tagout procedure steps aren’t bureaucratic hurdles—they’re a survival protocol. Every step exists because someone, somewhere, got hurt when it was skipped. From preparation to verification, from tagging to stored energy control, each phase builds a fortress around the worker.
Implement these steps consistently, audit them quarterly, and treat every machine as potentially lethal until proven otherwise. That’s not caution. That’s professionalism.
Frequently Asked Questions
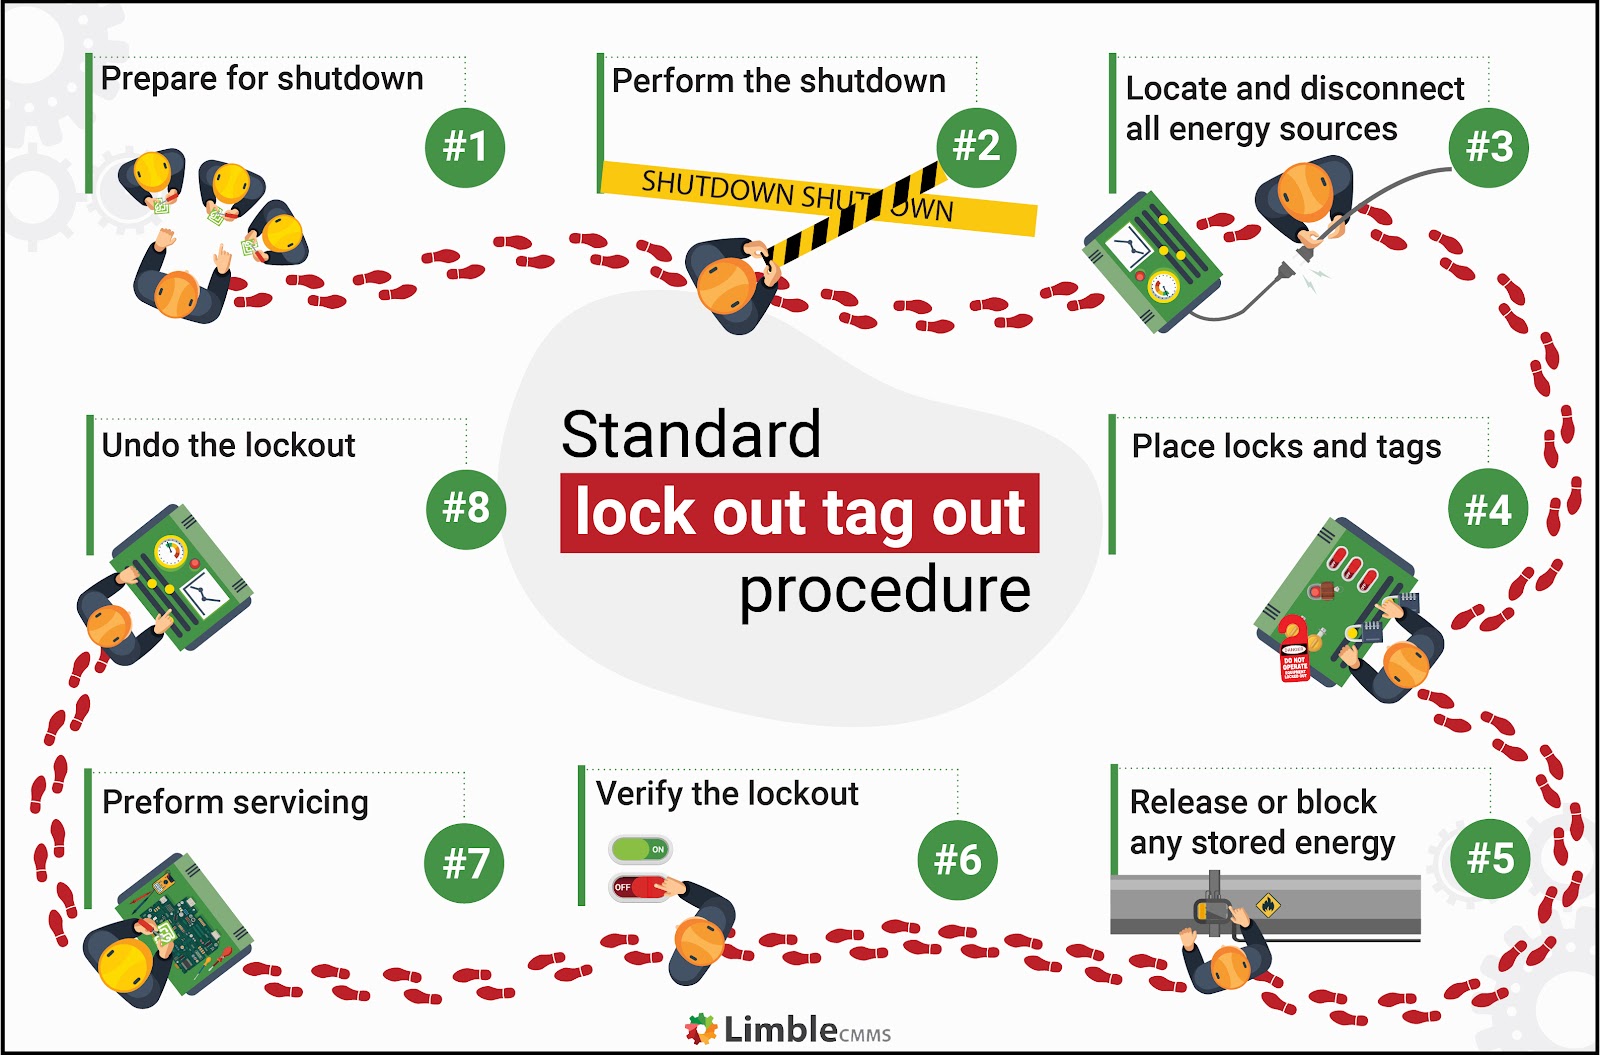
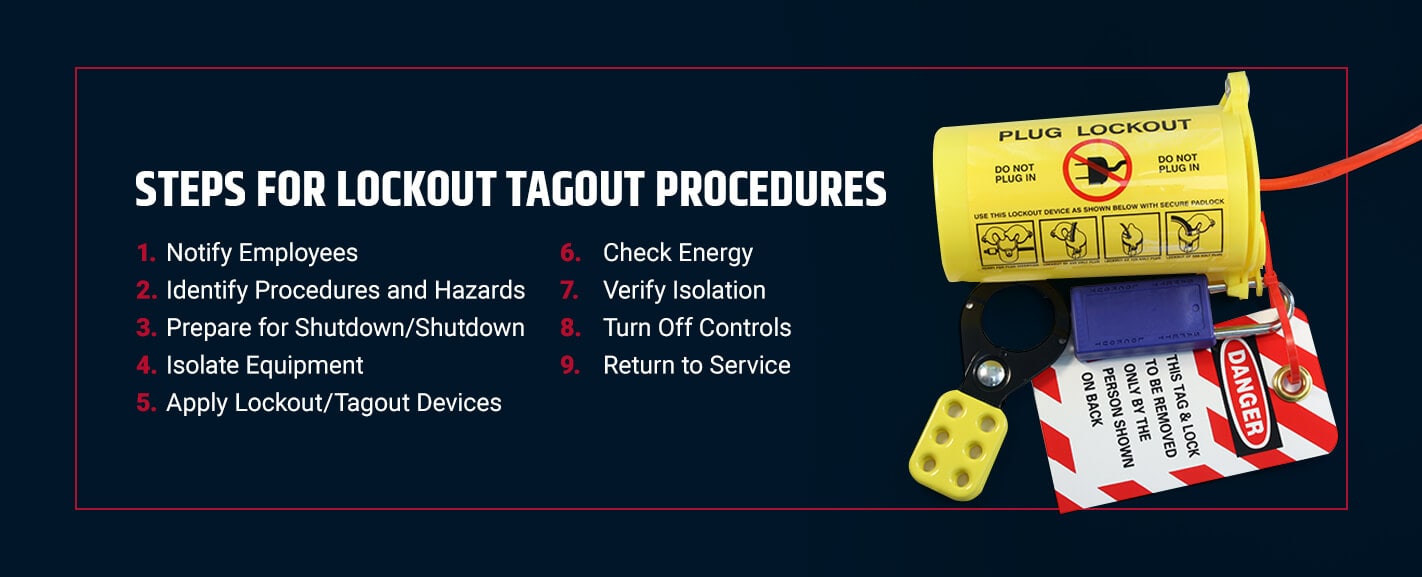
What are the 7 steps of lockout tagout? Prepare for shutdown, notify employees, shut down equipment, isolate energy sources, apply locks and tags, control stored energy, and verify zero energy state.
Who is responsible for applying the lockout device? The authorized employee performing the servicing or maintenance must apply their own lock and tag.
Can you use tagout without lockout? Yes, but only if the equipment can’t be locked out and the tagout provides equivalent protection. This requires a documented justification.
What happens if someone removes a lockout device prematurely? It’s a serious safety violation. Re-energizing equipment during maintenance can cause severe injury or death. Disciplinary action and retraining are required.
How often should LOTO procedures be inspected? OSHA requires periodic inspections at least annually, conducted by an authorized employee not involved in the procedure.
Do all employees need LOTO training? Yes. Authorized employees (who perform maintenance) need full training. Affected employees (who operate equipment) need awareness training.
Can multiple people work on the same machine under LOTO? Yes, using a group lockout strategy. Each worker applies their personal lock to a common hasp or lockout station.
FAQ
What should you look for in Lockout Tagout Procedure Steps That Prevent Workplace Injuries? Focus on relevance, practical value, and how well the solution matches real user intent.
Is Lockout Tagout Procedure Steps That Prevent Workplace Injuries suitable for beginners? That depends on the workflow, but a clear step-by-step approach usually makes it easier to start.
How do you compare options around Lockout Tagout Procedure Steps That Prevent Workplace Injuries? Compare features, trust signals, limitations, pricing, and ease of implementation.
What mistakes should you avoid? Avoid generic choices, weak validation, and decisions based only on marketing claims.
What is the next best step? Shortlist the most relevant options, validate them quickly, and refine from real-world results.